|
Inside the 360
|
 |
Tear
Down - Xbox 360
|
| |
|
Disclaimer:
Attempting any of these techniques will void the warranty on your
Xbox 360. I will not be responsible for your attempt to fix your
Xbox yourself. All information on this site is to be used at your
own risk. Also DO NOT fry bacon without a shirt on, it is very dangerous!
|
|
|
|
| |
This is an amalgamation
of several sites, noted in Reference Links,
on how to take apart a Xbox 360 console. I have now used this procedure
to perform 4 disassemblies and re-assemblies, and have it down to
less than 10 minutes each way. At no time will it be necessary to
apply brute force. While it may seem like the most gratifying option,
patience and a light touch will prevail. I am notorious for breaking
little bitty plastic tabs, but I was able to make it through without
snapping any of the many, so can you! |
|
|
 |
Tools
|
|
|
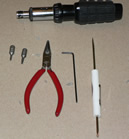
| To open up the 360 case
I have read several larger lists of tools required as well as
a single tool for the sole purpose of opening the box, that
can be purchased. I use 4 and a couple Torx bits. |
| Driver and Torx Bits T7 &
T12 - I am always looking for these, I have one set that
skips these sizes but luckily another that contained the right
sizes... have them before you begin. |
| Small Flat Head Screw Driver
- used to pry gently 8~) and to fit into the small slots on
the back of the 360 to release several tabs. |
| 5/64" Allen Wrench -
to fit through tiny air holes to push little plastic tabs as
you slowly pry up on the larger plastic shield ...no really. |
|
|
|
|
|
|
|
|
|
|
|
|
 |
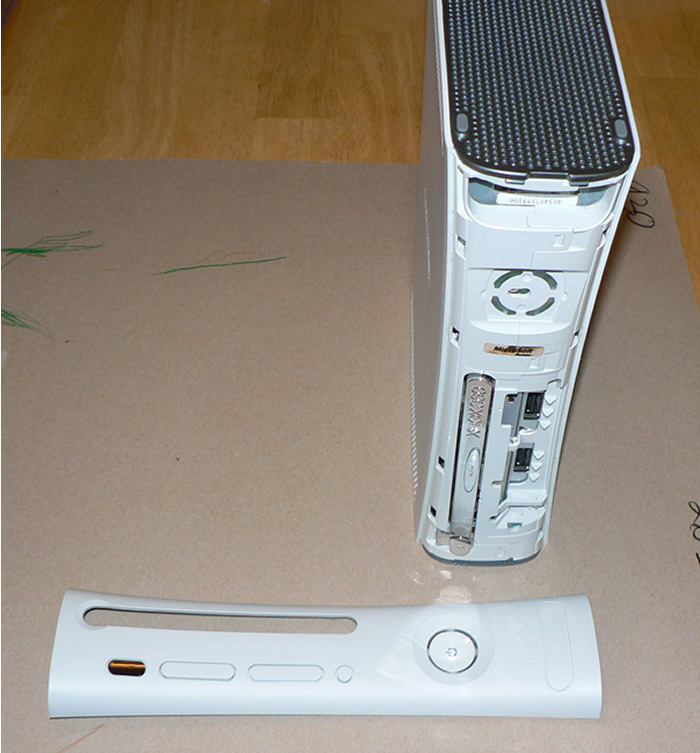
Remove the Face Plate
|
|
|
|
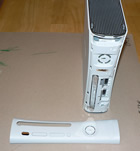
I have not read how to remove the face plate in the manual
that came with the 360, probably should. I read elsewhere
that you can slide your thumb in the door for the USBs and
press the sides and it will pop out ...
|
| I tried this for about half a minute
then carefully pried it off with my screw driver until
it popped off, nothing broken. |
| |
| |
|
|
|
|
|
|
|
|
|
|
|
|
 |
Remove Right Vent Shield
|
|
|
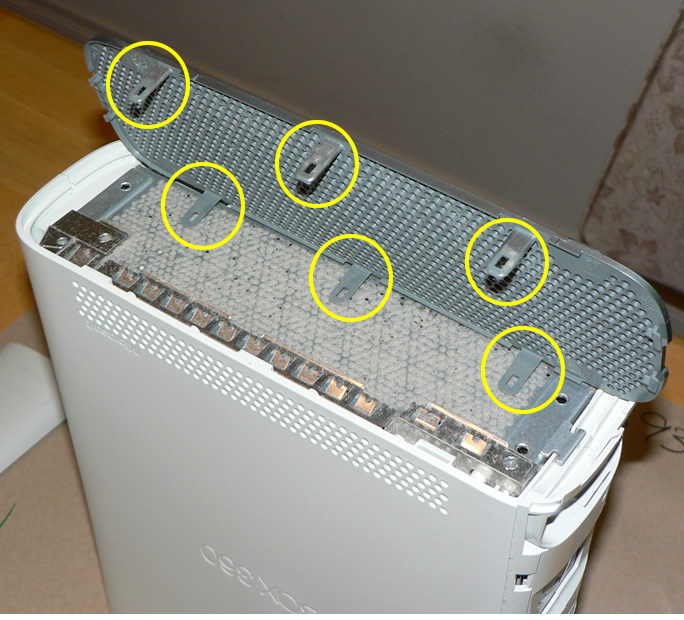
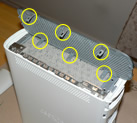
| This is where you get
to start using the Allen Wrech in the little air holes to release
the tabs while prying upwards. It's actually pretty slick. |
| Stand the 360 up on the end where
the Hard Drive was (you did remove it didn't you?). 3 tabs per
side and easy to find. MS does kinda mark them for you by using
filled holes, when it is off you can see it, sorta. |
| While gently lifting up at the front
of the plastic vent, fish around until you have released both
of the first set of tabs. Continue doing this to each set of
tabs until the Shield releases. |
| |
|
|
|
|
|
|
|
|
|
|
|
|
|
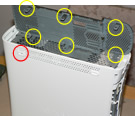 |
Remove Left Vent Shield
|
|
|
| Same basic procedure
to remove the Left as the Right. Just a little more difficult
as it is not flat, the locations of the tabs and where to press
them is less apparent. |
| Stand the 360 up on the side that
you just removed the Vent Shield from, and apply the same principals
as the step before. I seem to recall using my screw driver to
assist releasing the first set ... nothing broken. |
| You must remove the back foot in
order to gain access to the fine tab (red circle). |
| |
|
|
|
|
|
|
|
|
|
|
|
|
 |
Remove Bottom Case
|
|
|
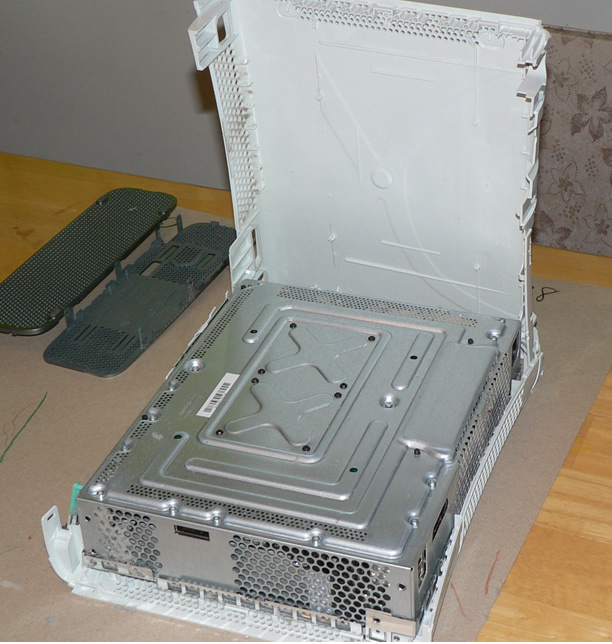
| My picture does not do
this justice but I will walk you through it. This is where a
little patience might be needed as getting everything released
at the same time may take several attempts. |
| Turn the 360 so the front is facing
you and set it on it's top (so you are looking down at the feet).
Release the four plastic tabs at the front using the screw driver
where/if necessary. Raise the case above the tabs. |
| Now, turn the 360 around, you will
see several little rectangular openings along the seam between
top and bottom. Insert your screw driver in these slots to release
the tabs, when things are going right you will hear a distinct
pop as you release them. Don't let the front of the case come
down and re-engage the tabs there. |
| Once all the tabs are removed you
should be able to lift the Bottom Case straight up to remove
it. |
|
|
|
|
|
|
|
|
|
|
|
|
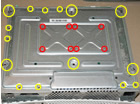 |
Remove the Top Case
|
|
|
| Here is where you get
to put your driver and Torx bits to use. Wasn't the great thing
about Torx screws, was that they were really hard to strip the
head? I digress, but take it as a word of caution on the blacks. |
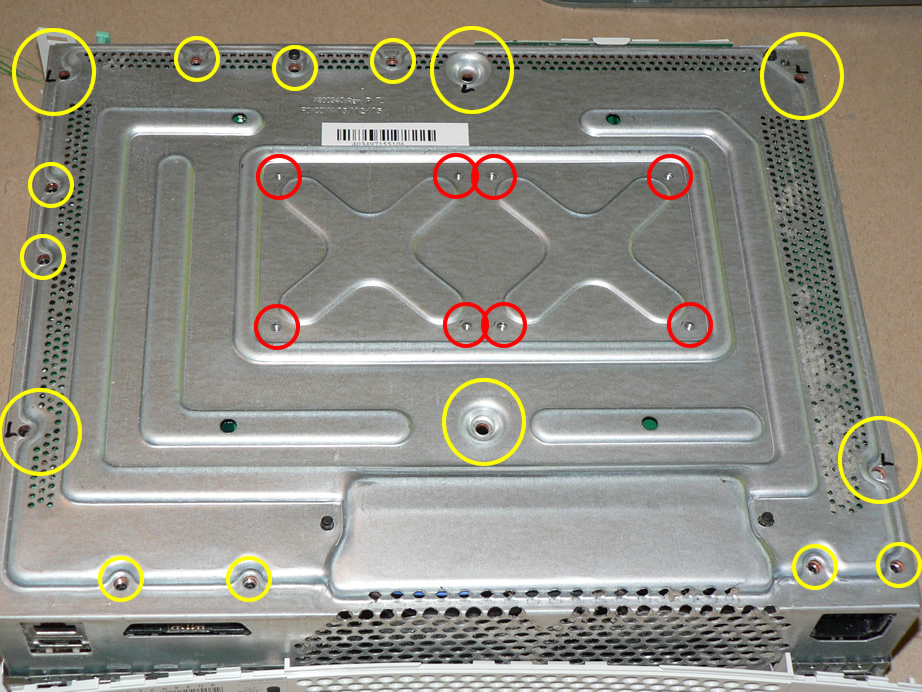
| Depending on your objective you may
not need to remove all the screws. I removed them all but suspect
only the 6 long silvers connect the Top Case. The blacks hold
the CPU and GPU and can be left alone. |
| You will need to remove 15 silver
T12 screws mainly along the outside edge of the 360 (yellow
circles). 6 of these are long (big circles) and 9 are short
(small circles). Then the 8 black T7 screws (red circles). |
| You can then flip the 360 back over
and gently remove the Top Case. Watch for the DVD's eject
button, hold it out using a finger as you lift the Case off.
|
|
|
|
|
|
|
|
|
|
|
|
|
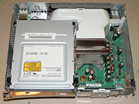 |
Final Steps
|
|
|
| At this point you are
down to the Chassis, the DVD and the on board components. If
you have removed all the silver screws you should have no problem
lifting the final components out. |
| Simply slide your hand under the
DVD and lift it up. It sits on raised pegs, one of which goes
through the Ventillation Shroud. Watch for the green plastic
arm that goes from the button on the DVD through the chassis.
The DVD can rest on the side of the Chassis (it will run this
way) or be disconnected. |
| There is a single tab holding the
Ventillation Shroud on, right between the 2 fans. The Shroud
can be removed with a combination of twisting and lifting. |
| I would not / did not remove either
of the heat sinks for the CPU and GPU unless I was going to
work on those Units and believe me, there is work that can be
done there, including a TROD fix. |
|
|
|
|
|
|
|
|
|
|
|
|
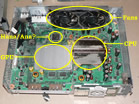 |
Inside the 360
|
|
|
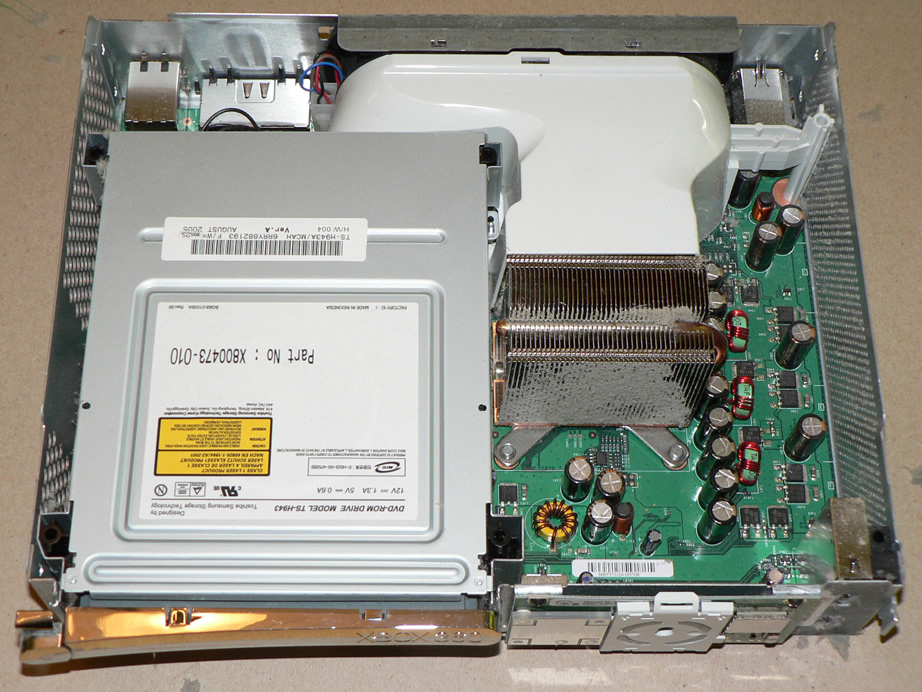
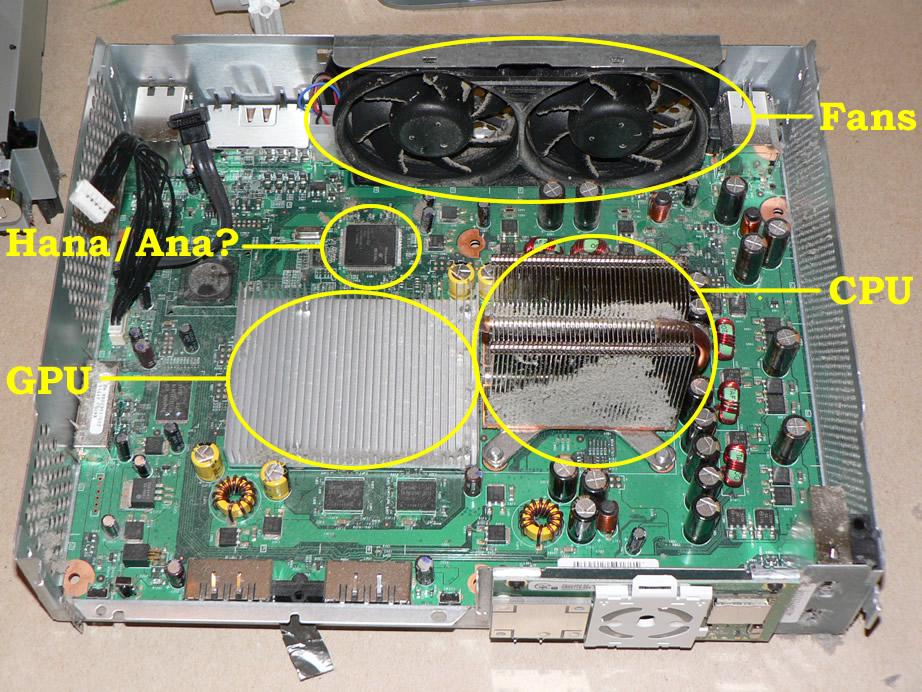
| The exposed guts of the
360. As you can see from mine, I would strongly suggest using
a can of condensed air to clean the dust that will have built
up. Your 360 should run a lot cooler after an air bath. |
| You would now be ready to attempt
any of the sometimes bizzare DIY fixes, that are available here
and on the web, for Xbox 360 repair. From the dreaded TROD to
the elusive E74 there are cures out there. |
| |
|
To Put Back Together: Turn your monitor upside down
and scroll up! 8~)
|
|
|
|
|
|
|
|
|
|
|
|
|
(C) Evolution Printing
and Publishing House, 2007
|
|
